Configuring the blocking dialog
Just like configuring the limits, you can also configure the blocking dialog. The blocking dialog appears if and only if the user has actively attached devices that exceed his or her allowed maximum.
Here are all the ways you can configure the blocking dialog:
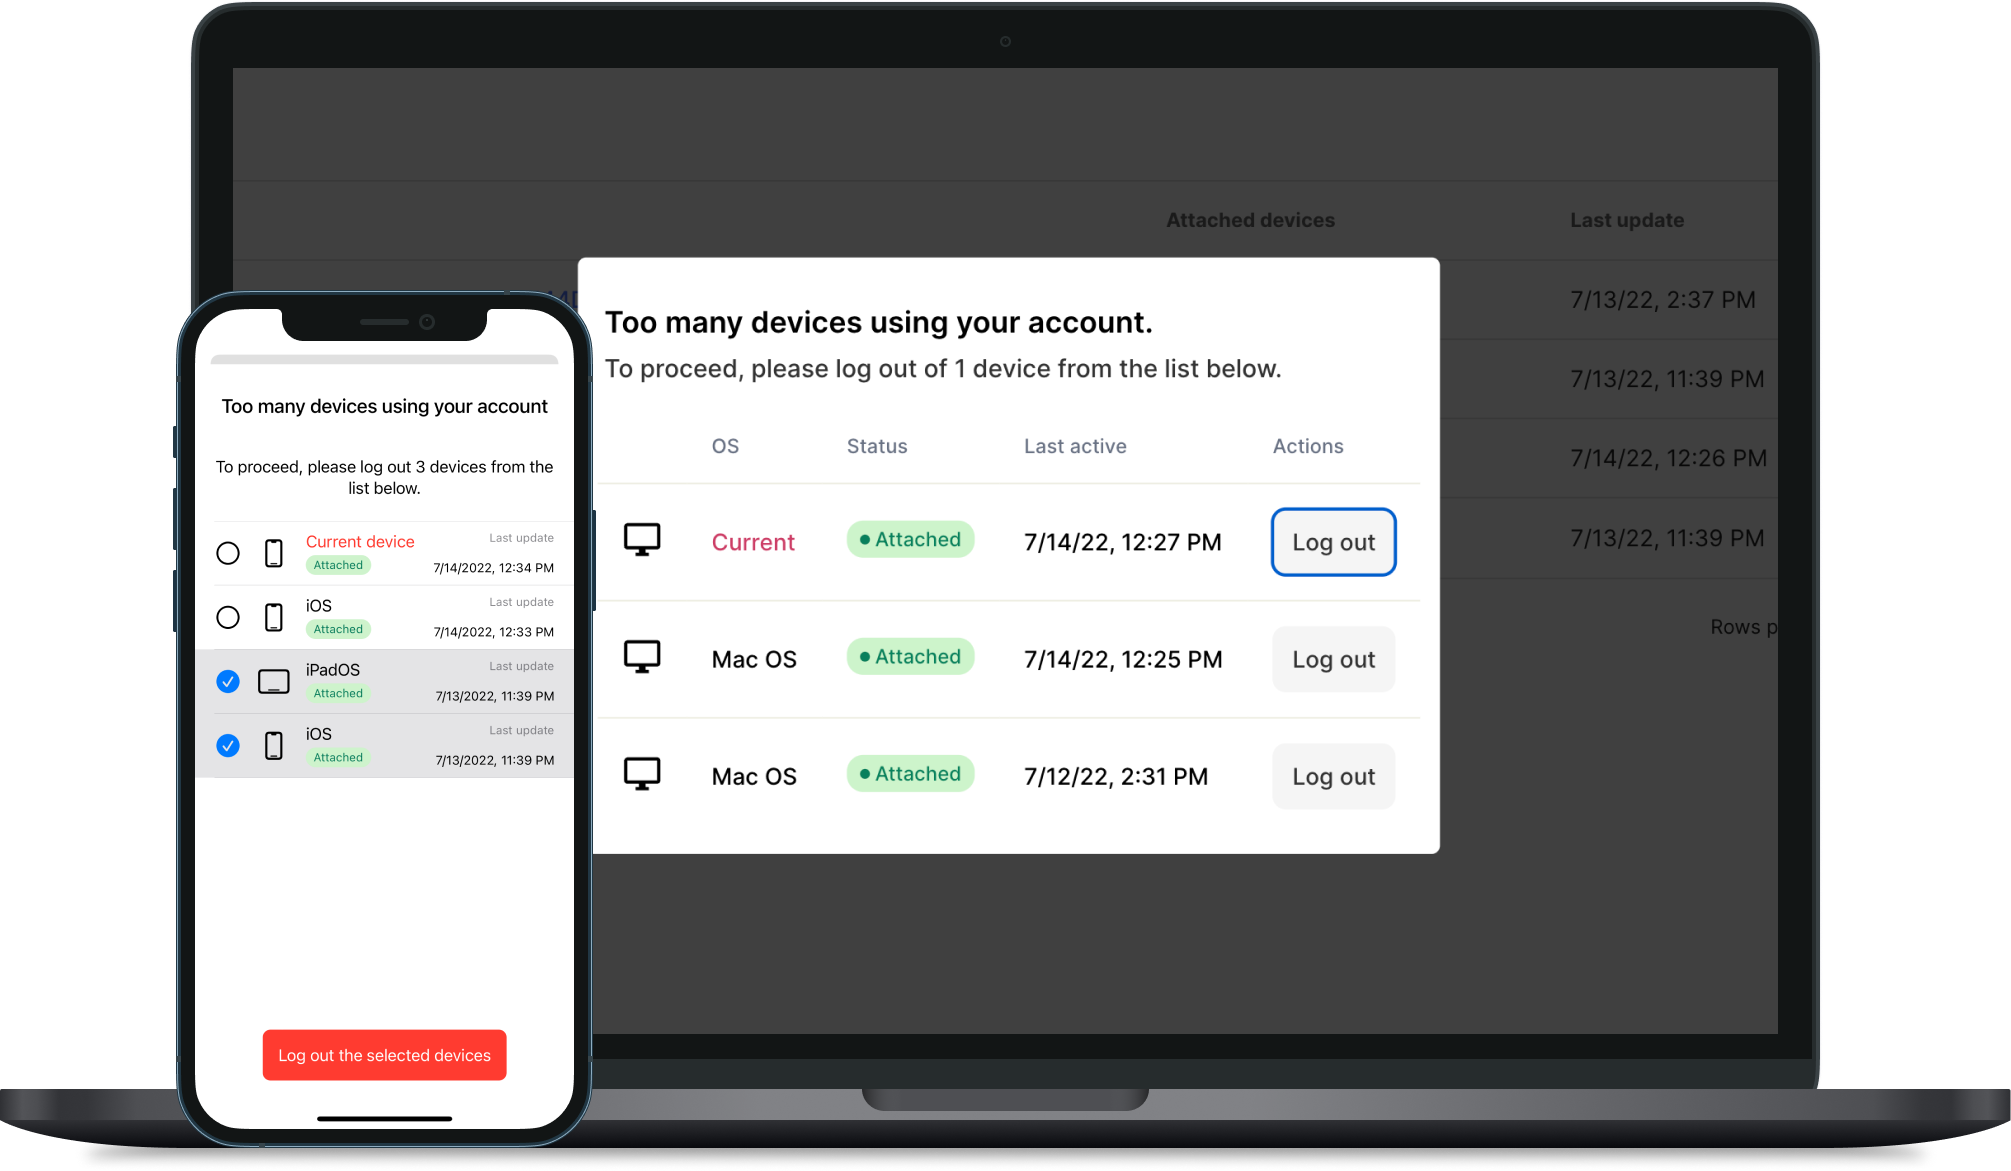
Example of blocking dialog
If you also pass visibility control variable to the client SDK, it will always override the dashboard value. The dashboard value only works as a fallback. If you want to rely on the dashboard value only, you must leave the dialog visibility variables null in the client SDKs
Dialog visibility
By default, the dialog will not appear if the users exceed the maximum allowed devices. You can control this behavior by doing the following.
Dashboard
To rely on the value from the dashboard, make sure you do not pass anything to the show_blocking_dialog parameter on the attach function in the client-side SDK. The fallback value found on the dashboard will be used. The dialog visibility can be changed on the settings page.
Client SDKS
Here's an example showing how to control the visibility of the dialog using the JS SDK. Remember this value will always override the dashboard setting. Set the show_blocking_dialog to true to show the dialog if the limit is exceeded .
try { await Sabil.attach({ show_blocking_dialog: true, client_id: "client_id", user: "user_id", limit_config: { overall_limit: 2, }, on_current_device_logout() { //TODO: [Important] implement your logout logic }, });} catch (error) { console.error(error);}Dialog theme & appearance
Each SDK comes with a set of customizations for the them and appearance. Click below to view each SDK's appearance options.
- Customize the JS blocking dialog.
- Customize the iOS blocking dialog. (See native SDK docs)
- Customize the Android blocking dialog. (See native SDK docs)