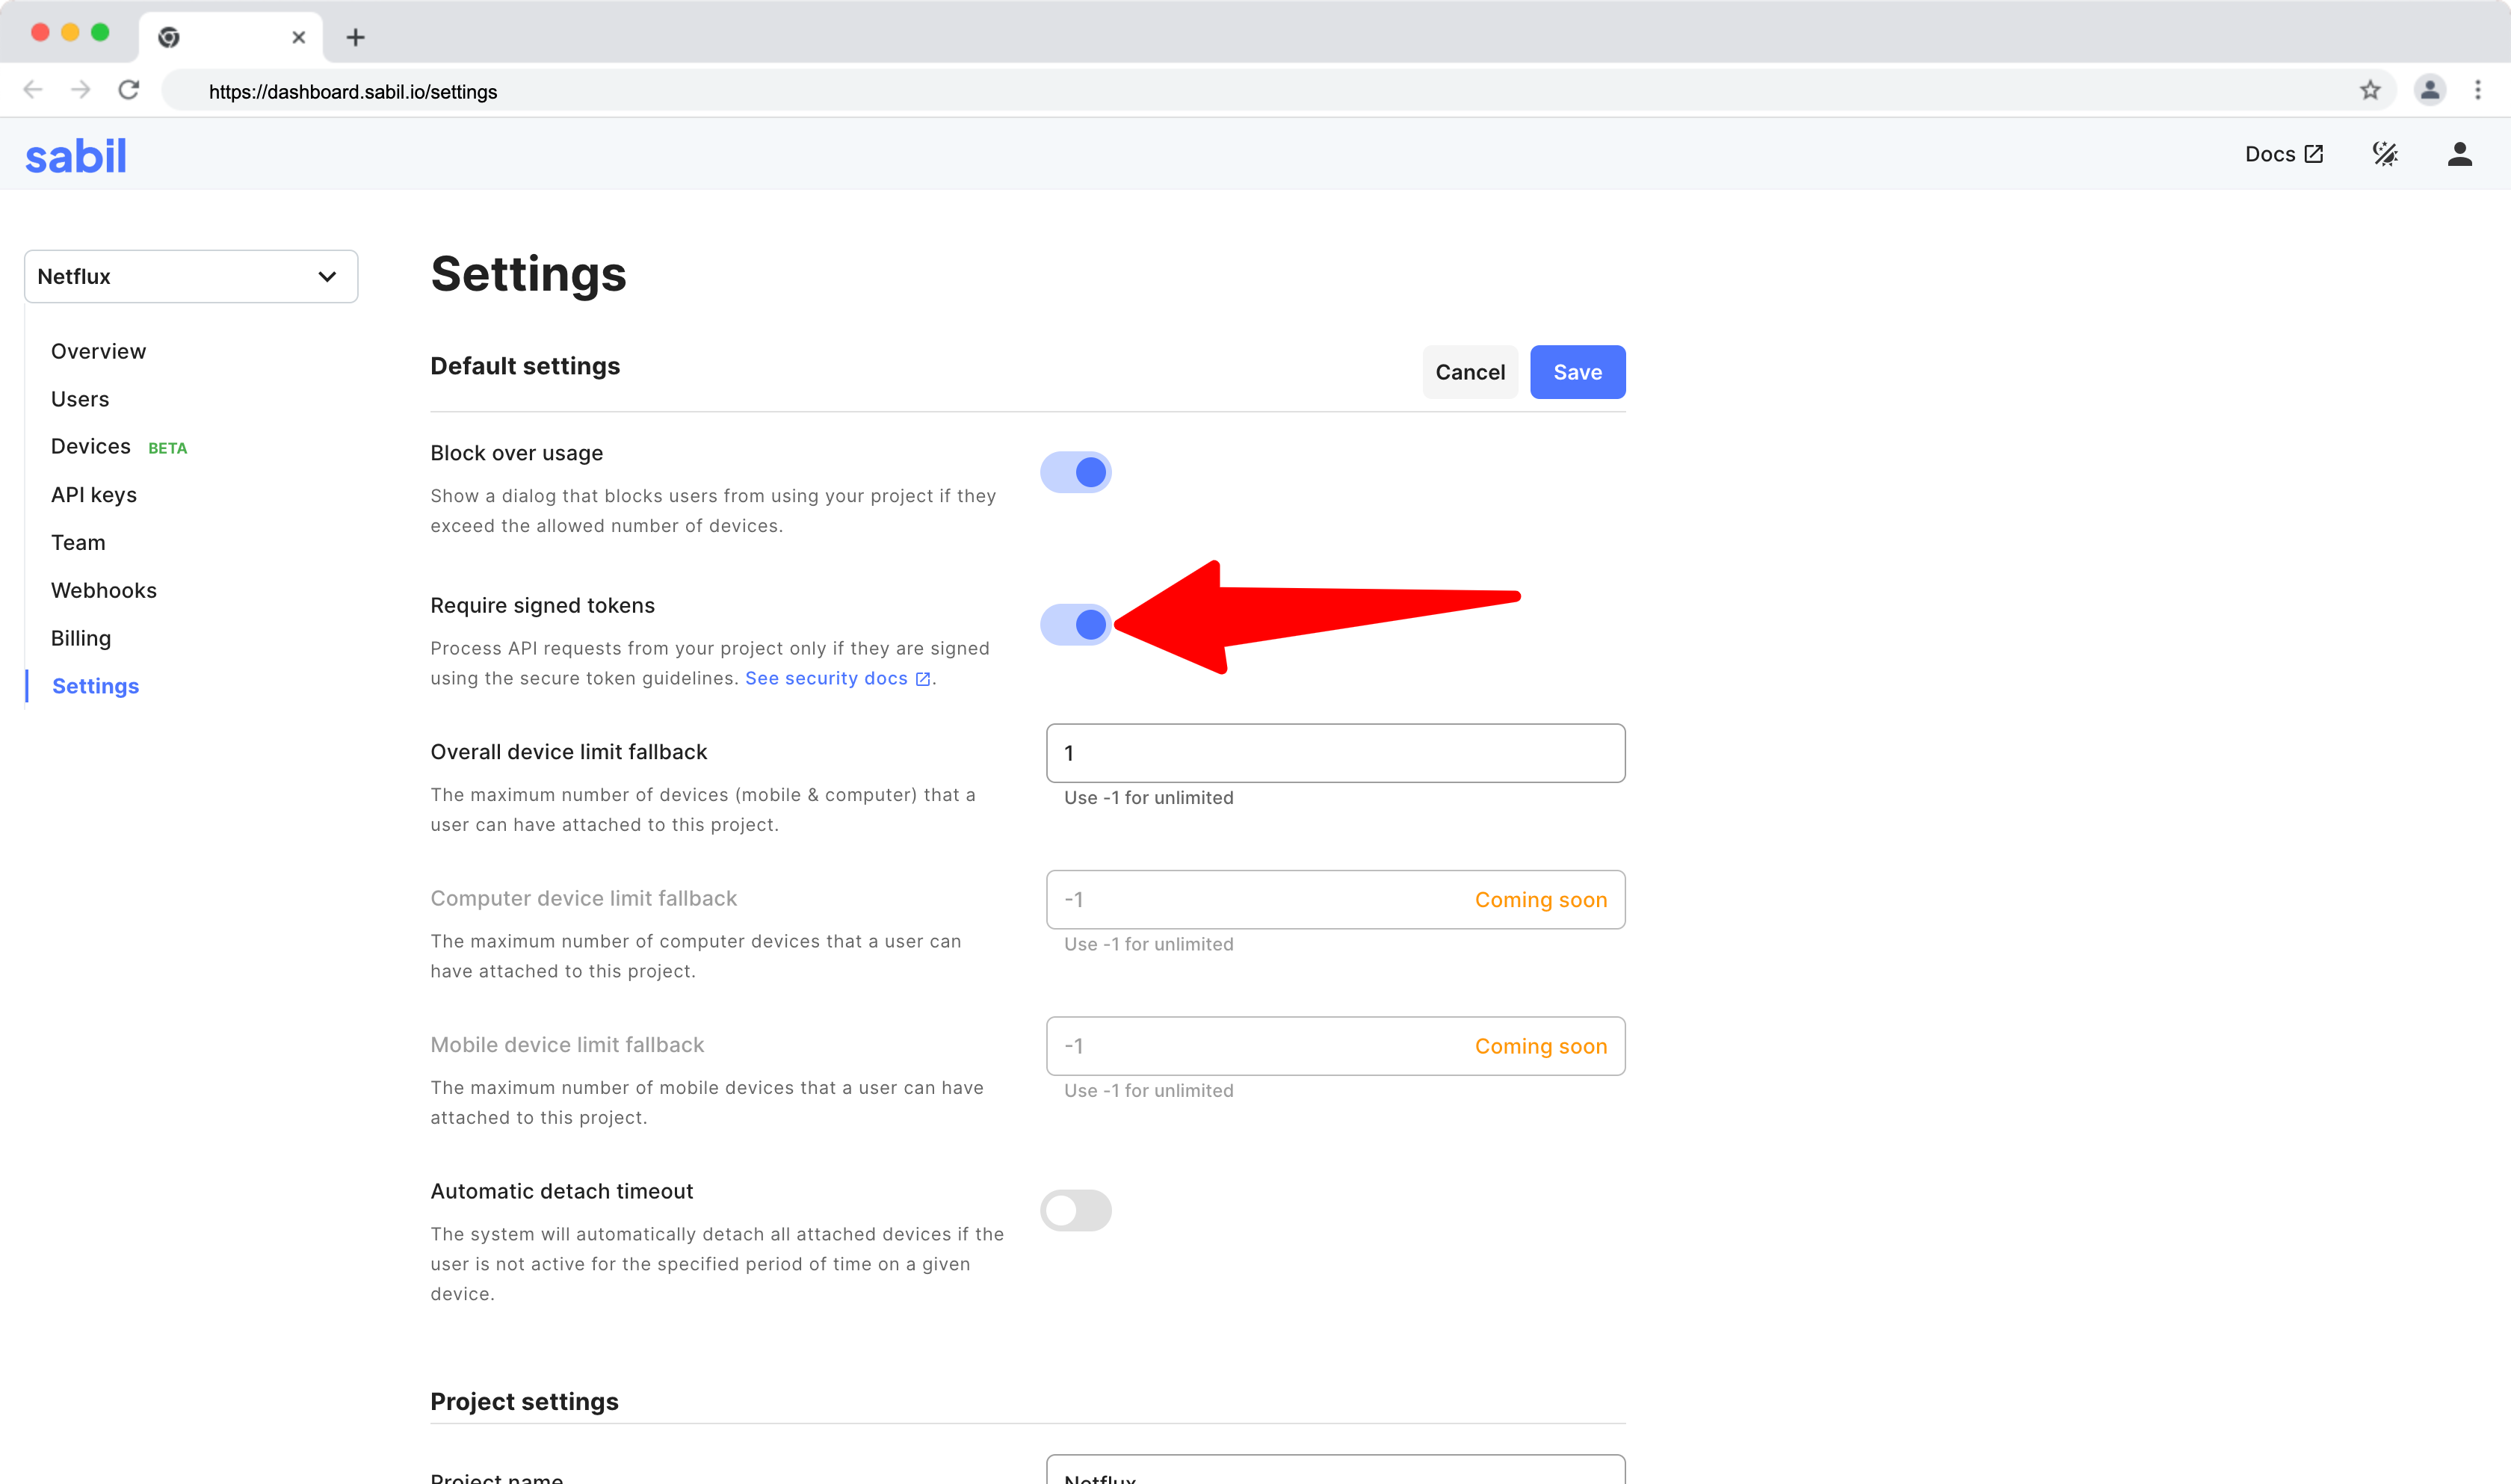
Using signed security tokens
For most customers, this is not necessary. But if higher security is a concern for you, then you can add more security to your requests by signing each request from your server and then passing the result to each call you make to Sabil. You must configure your project to require signed tokens. Sabil will reject any call that does not pass the verification test.
Follow these steps to start using signed security tokens:
- Configure your project to require signed tokens.
- Create an endpoint on your server that will return signed tokens. This endpoint is responsible for signing and returning a signed token using your API secret key.
- This endpoint should be called whenever you want to send a secure device request on your clients.
- In this endpoint call the Sign endpoint and return the
secretto your client. This is a paid API request. You can also sign your own secret - Make sure you also include an expiration date when returning to your client and that your client only refreshes the token if expired. This part is not handled by Sabil on purpose to give you flexibility to set your own expiration window.
- Ensure you rate-limit your endpoint with your desired rate limit. This should be what you expect from a normal user in your app. If your rate limit is triggered, it's a good idea to throttle the session/user that is exceeding the rate limit.
- The
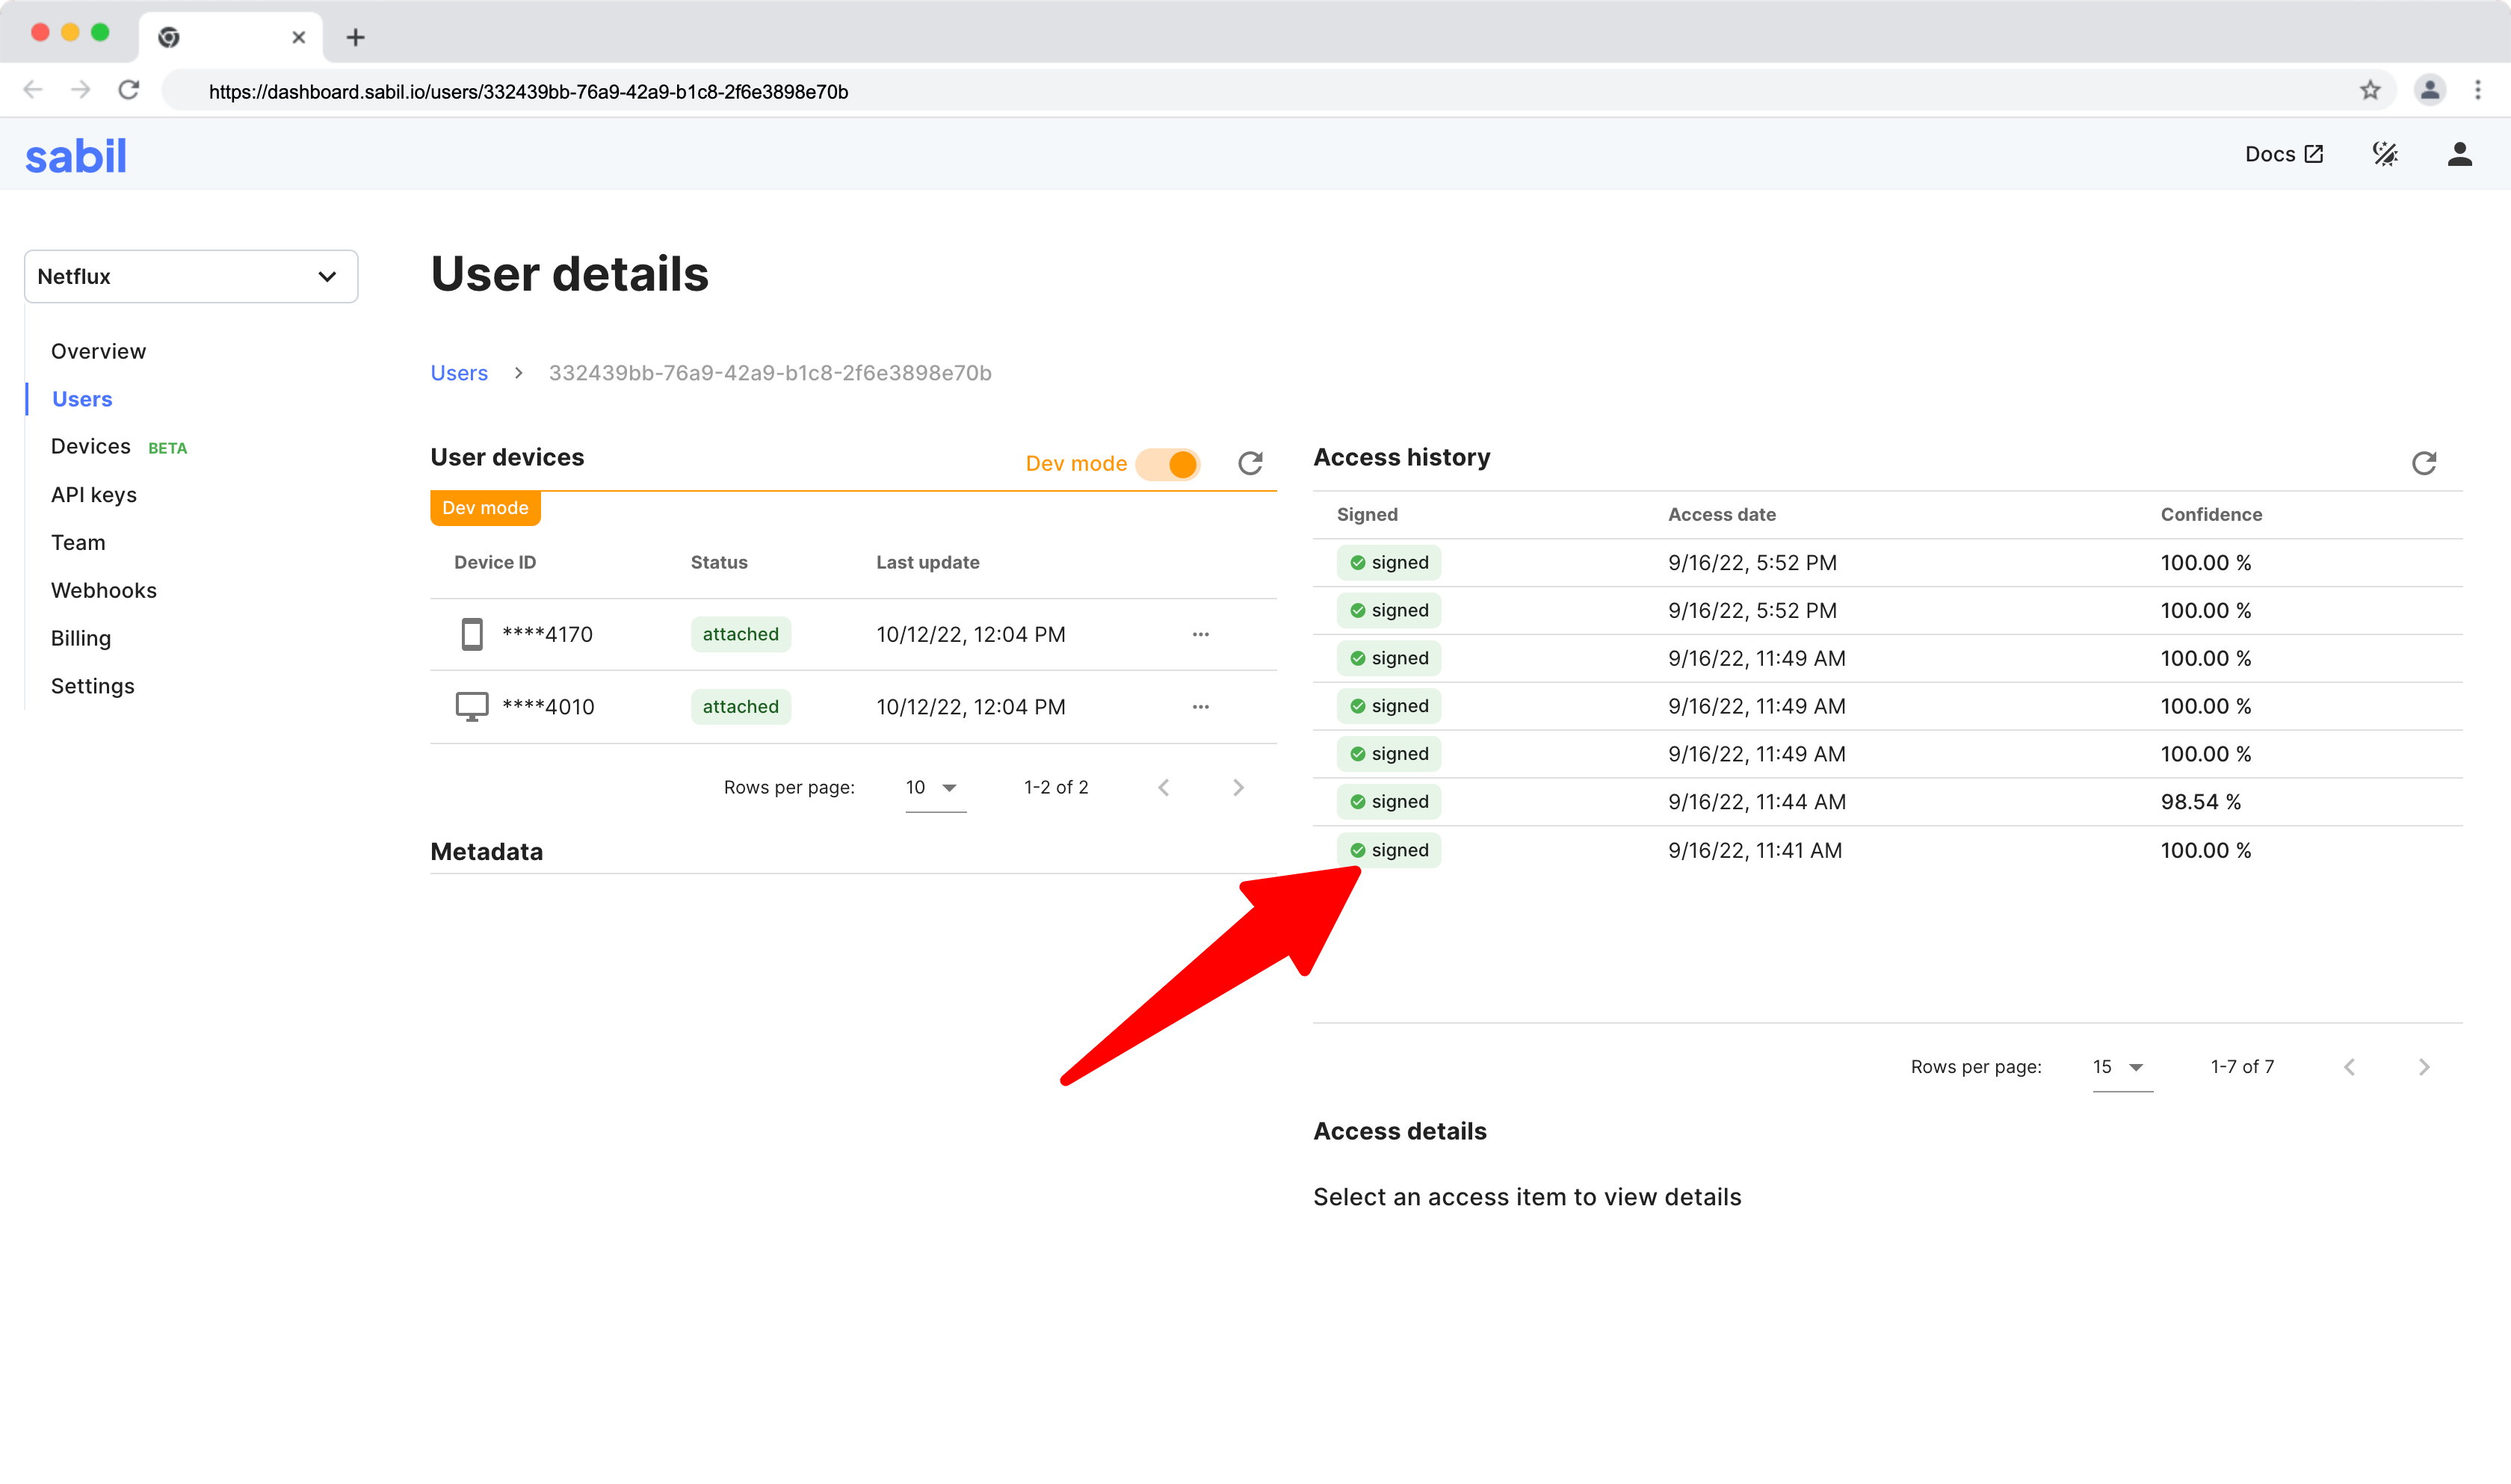
secretreturned from your endpoint should be used in theattachandidentifyfunctions as a parameter. Sabil will verify that the token is valid and passes all the tests otherwise, it will reject the call with a 401 error. - Once the requests are made, you can verify the status of the accesses (whether they are signed or not) in the access history view of any given user.
Signing your own JWT tokens
If you don't want to use Sabil's Sign endpoint, you can generate your own secret token by signing a JWT token with an algorithm type HS256 using the following parameters:
- Payload:
- For
attachrequests, use the following payload:
{ "user": "the_user_id_here" }- For
identifyyou can this payload:
{ "user": "unique_id_for_the_event" } - For
- privateKey: your API secret.
You can use this secret in your attach and identify calls. Use the JWT website to debug: https://jwt.io/#debugger-io.
Sabil will verify the secret against your API secret. For the attach call, user ID must match the user who's being passed to the attach call or Sabil will return an authorized status code.